I’ve tried TrueNAS off/on for years, however,until June, I’d never put any serious workloads for my home lab setup on it. This blog posts covers my current / future plans for TrueNAS
The need
My storage needs for my home lab are two-fold
- Large spinner based storage for media (plex) and binary downloads
- Fast NVM based storage for vSphere-based VMs
Over the years, I’ve covered both requirements via different means. For the media storage, I’ve generally used a single large spinning drive, which I will replace when it gets close to 90% filled. So, I’ll buy a 5 TB drive, and replace it with a 10 TB drive some years later, migrating over the data via my favorite backup tool SyncBack (link)
Working with servers connected to scalable enterprise storage over the years, I’ve been inspired to change how I scale my storage needs. With TrueNAS , you can scale up your zVOLS by adding extra physical storage
The hardware
A few years back, I’d tried out TrueNAS via an older HP Microserver. However, I ran into lots of build issues ; having to buy janky adapters to fit 2.5 SSD boot drives, unexpected reboots, not working with my existing Intel DA2 10GBe network cards, so, I sold it.
This time around, I decided to use a spare HP EliteDesk G4 Tower (OEM link)
The hardware list:
- Intel DA2 10GBe NIC
- 16 GB DDR4 RAM
- Core i7-8700 (6 cores / 12 threads)
- 120 GB Patriot SSD for boot drive for TrueNAS (Amazon link)
- 1x Samsung 1 TB NVM for VM storage
- TBD Spinner for downloads & media, more than likely I’ll go with a second zVol that’s made up of 3 or more drives that total 30 TB
I’m using the built-in 1GBe NIC for mgmt of TrueNAS scale. I ran into an issue with my Intel DA2 10Gbe NIC, it was detected in the TrueNAS web GUI, but showed the network connections as disconnected! Oh snap! Some quick Google fu lead me to the a blog post of other users reporting similar issues (TrueNas forum post link)
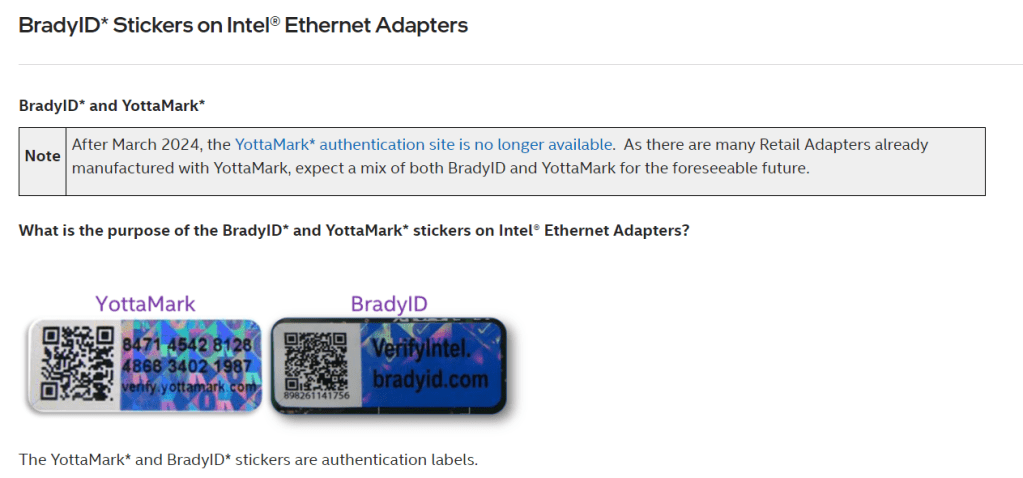
Within the above forum post, it’s mentioned that genuine Intel cards will have a special sticker affixed from Intel:
https://www.intel.com/content/www/us/en/support/articles/000007074/ethernet-products/gigabit-ethernet-adapters-up-to-2-5gbe.html
TBH, I’ve been buying Intel DA2 10GBe cards for years now, I’ve never paid attention to the stickers shown in the above article
However, swapping out one Intel DA2 10Gbe card that didn’t have a sticker, for one that did resolved my issue! So, buyer beware if you’re using eBay to procure your 10GBe cards like me
With the above issue resolved, I went through the following process to create a new zVol associated to my single Samsung NVM SSD
- Create Pool
- Dataset will be auto created
- Create zVol when done
- Access SERVICES > Enable iSCSI
- SHARING > BLOCK (iSCSI)
- Create iSCSI instance
- Set extend to device > zVol created in step 3
- Target global config, amend IQN name as required, or leave default
- Add portal, choose NONE for auth protocol and select the IP associated to the 10GBe network
- Initiators select ALL
- Authorized access leave BLANK
- Targets > select portal group 1 / initiator group 1 as per the screenshot
- EXTENT > EXTEND > Choose DEVICE, and select zVOL
- ASSOCIATED TARGETS > Target “iscsi-300gb”, LUN ID 1, select extent
On ESXi host, select iSCSI software adapter, put in IP of FreeNAS host - Connect to new storage on ESXi host
- vMotion over related VMs to new connected storage
that’s it! I’ll update the blog post once I’ve added the spinner (long term) storage drives
Owen
